About a year and a half ago, a work buddy of mine and I decided to put together our FEMA recommended 72-hour emergency kits for our families. This wasn’t just a trip to the Red Cross website, oh no, we put together our own First Aid kits, bought our tarps, our rope, our water, our food, our gloves, whistles, dust masks, rain gear, flashlights, etc. And then I had to find something to put it all in, because apparently it didn’t provided an added decorative element to living room…
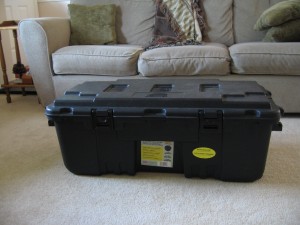
So whilst browsing at home depot, (what? you don’t do that?) I came across this container on wheels and thought, yes, this will do just fine.
And no, I really can’t be bothered to remove the stickers, and yes, naturally we began using it as a coffee table, because we really can’t be bothered to actually buy one of those. So here is the dilemma. I really like having the emergency kit in the house and within easy reach so I can rotate out the food and expiring first aid supplies, but let’s be honest, it’s ugly as sin. And then I had an epiphany. I like putting my feet up, the emergency kit likes having my feet on it, but it is a little hard and a little low to make that really comfortable. If only I could make it into an ottoman. ….But wait, I can…
So off I went, to the recesses of my brain, to plot and devise a crafty solution and here is what I did.
Supplies:
- 1/4″ plywood big enough to match the widest and longest measurements of the case. (don’t get the best stuff you are going to cover it)
- A 3 foot length of 1″x3″
- 2 1/2 yds of home decor fabric (buy enough for your needs, this is what I calculated I would need. Don’t forget to include a 1/2″ seam allowance on your measurements)
- 3″ thick foam padding (this stuff is expensive!)
- Upholstery Adhesive (to glue the foam to the wood)
- Wood cutting tools
- A nail gun (or a hammer)
Process:
- Pre-wash your fabric. Before doing this you may want to sew/serge the raw cut edges of the fabric so it doesn’t shed a lot of thread in your washer.
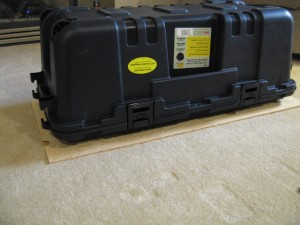
- Measure your case and determine how big you want the top of your ottoman to be. In my example, since my case is so big I wanted the top to be big enough to cover any protruding parts (there are tie down hooks at each end) so that I would bang up my legs on a pointy bit if I ran into it.
- Transfer those measurements to your plywood and cut it out. I then tested the fit below by flipping the case over onto the board. You can really see those hooks I referred to earlier.
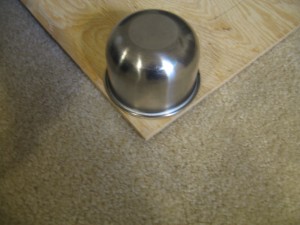
- At this point you have a decision to make. What to do with the corners. I didn’t want to cover the pointy bits on the case only to have pointy corners on the ottoman, so I opted to round off the corners. I tried to draw the corners while the case was on top of the board, but I’m not that skilled so the kitchen provided me with an alternate solution.
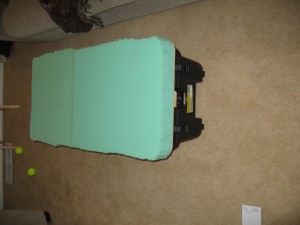
- With the top cut to size it is time to make the cleats to hold it in place on top of the ottoman. My case has a two level top (see first picture), so I cut my cleats at a 20 degree angle to kind of match the angle of the rise and glued and nailed them into place with a brad nailer. In hindsight, there probably are other solutions to keeping the wood in one place, like that rubber stuff you put in kitchen drawers or under rugs. But I knew that I would be accessing the case fairly frequently so I didn’t want the hassle of repositioning something like that every time.
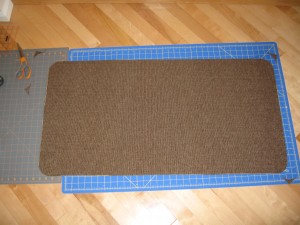
- Now that the wood work was done I decided to use the top as the template for cutting out the top piece of fabric for the ottoman. Remember, if you remember nothing else, to add an inch for seam allowances. I also used the same bowl that I used for the wood, to curve the corners of the fabric.
- Now it is time to glue the foam onto the board. I would recommend doing this outside on a calm day, the spray glue has the potential to get everywhere. Once the glue was basically set I then used a bread knife to trim down the foam. While the end result does not appeal to my obsessive need for clean lines… it was going to be covered so I made my peace with it. 🙂
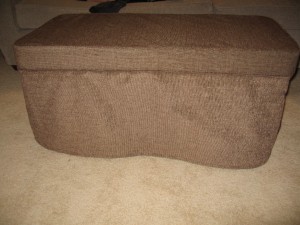
And then I stopped taking pictures because I was having fun sewing. My Bad! Basically I cut out a top (pictured above), a border that was about the width of the foam core, some piping of the same fabric for just below that and then the skirt. Below is the finished product.


Leave a Reply
You must be logged in to post a comment.